
If you’re not an expert, connecting speaker wires can be daunting. But with some basic knowledge, you can connect those wires like a pro.
First, understand the different connection types – binding posts and spring clips. Then, decide which type of termination you want to use – bare wire, banana plugs, spade or pin connectors.
With these basics, you’re already halfway there. So, grab your wire strippers and let’s begin!
A speaker wire consists of two separate cables that connect to the positive and negative connectors on the amplifier and speaker. You don’t need to worry about how you connect the wires – even if they have plus and minus markings.
Make sure you connect the same piece of wire to the positive and negative terminals on the amplifier and speaker.

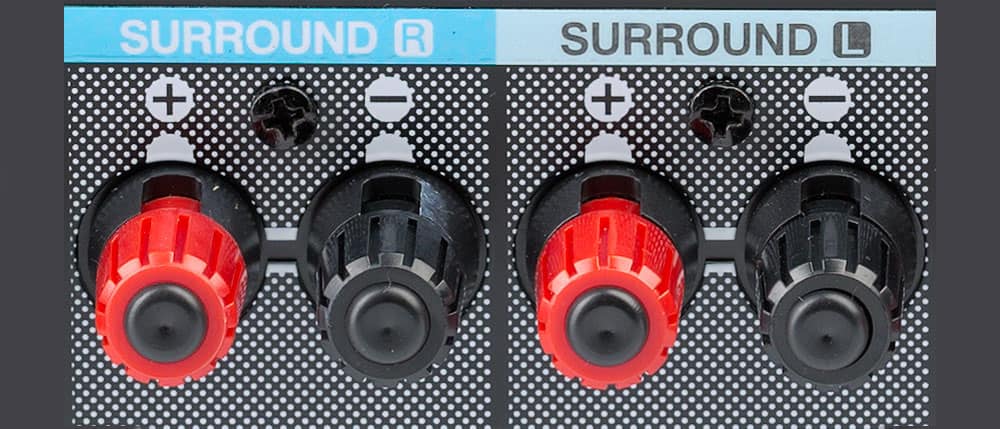
The binding posts on the rear of an AV receiver (as shown below) have two posts for each speaker, clearly labeled as positive and negative.
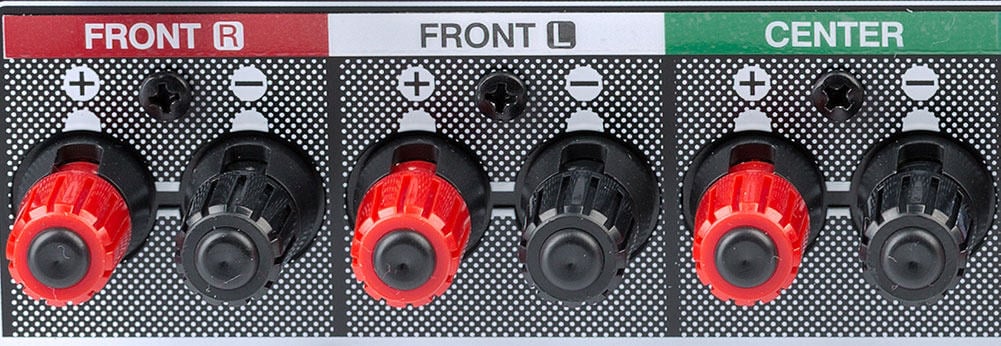
Typically, the positive side is red, and the negative side is black, but they may not always use color coding.
One wire will connect the positive and negative posts for a single speaker output. The other end of that same wire will connect to the speaker.
Remember, you must wire the amplifier’s positive terminal to the speaker’s positive connector. Do the same with the negative connections.
The first thing you want to do is look at the connections on your speakers and amplifier. This will determine how you can connect the speaker wire.
There are two main types of connections that you will encounter.
Just be aware that you may have one type on the amplifier and a different one on the speaker.
Binding posts are found on all kinds of amplifiers and speakers – from budget models to high-end equipment. They are the most common type that you will come across.
There are often two ways of connecting the speaker wire to these:
So, for this type of connection, you can use bare wire – or connect spades or banana plugs to the end of the speaker wire.
Speakers that have binding posts might not have an opening at the end to insert a banana plug. Some do, but it’s more common on amplifiers.
A binding post on a speaker will often look like this:
So, with his connection, you can insert bare wire into the hole and then tighten the screw.
Or, use a spade connection and place it around the post before tightening it up.
Spring clips are more common on budget amplifiers and speakers – and all-in-one systems. However, they can be found in all types of equipment.

All you need to do is push the bottom part of the clip and push the speaker wire into the hole above.
You can use bare wire or pin connectors with this type of connection.
Now that you know what type of connections you have for your speaker wire, you can decide how to terminate the ends.
Attaching a connector to the end of a length of speaker wire is known as terminating the wire. Here are the main options for terminating speaker cables.
| Termination | Description | Pros | Cons |
|---|---|---|---|
| Bare Wire | No connector attached | Simple | Can loosen over time |
| Banana Plug | Insert into binding post hole | Secure connection | Can be difficult to insert due to tight fit |
| Spade Connector | Screw tight with binding posts | Angled versions for tight spaces | Can put stress on connections if wire is pulled |
| Pin Connector | Insert into spring clips or binding posts | Better for spring clips and tight spaces | Less secure for binding posts |
The first option, bare wire, doesn’t require any connector at all.
All connection types will accept bare speaker wire. This is the easiest method as you don’t need any extra accessories.
All you need to do is:
If using bare wire is the easiest way for you to achieve your goal, then go with it. I wouldn’t lose any sleep over this. However, attaching connectors can have advantages.
Banana plugs are my favorite way of connecting speaker wires. You will need to buy these as a separate accessory to your wire.

You will need four banana plugs per wire – two for each end of the cable.
Of course, that is assuming that you will be using banana plugs for both the amplifier and speaker. You might not want to – or be able to.
Banana plugs may attach to the cable in different ways.
Many come with screw-in connections that just need to be secured to the cable with a small screwdriver, which is one of the easiest methods.
Some are self-crimping, which just means they will clamp the cable when you tighten the plug cap.
Others may need soldering. So only choose this type if you are prepared to break out a soldering iron.
The general procedure for connecting screw clamp banana plugs to speaker wire is:
Each plug can then be inserted into the end of each binding post.
I often forget to thread the cap onto the cable before securing the plug to the wire. Which means I have to undo it all again!
After doing this a couple of times, I usually start to remember!
You may find some banana plugs that connect to the wire in a slightly different way to this, but the general idea is the same.
You won’t appreciate how much easier banana plugs are to work with until you are crawling around the back of an amplifier trying to attach the bare wire to a binding post.
Popular Banana Plugs
What Is It: A robust banana plug for connecting to the ends of speaker wire - which makes wiring your system easier.
Some people like to solder the wire to the plug to create a more robust connection – even if it is a screw-in model. You can if you wish, but you don’t have to.
Banana plugs with screw-in connections work perfectly well without soldering as long as you are careful when you join them together.
However, there is a chance that they might loosen over time, so you might need to check the connection if you reconnect them regularly.

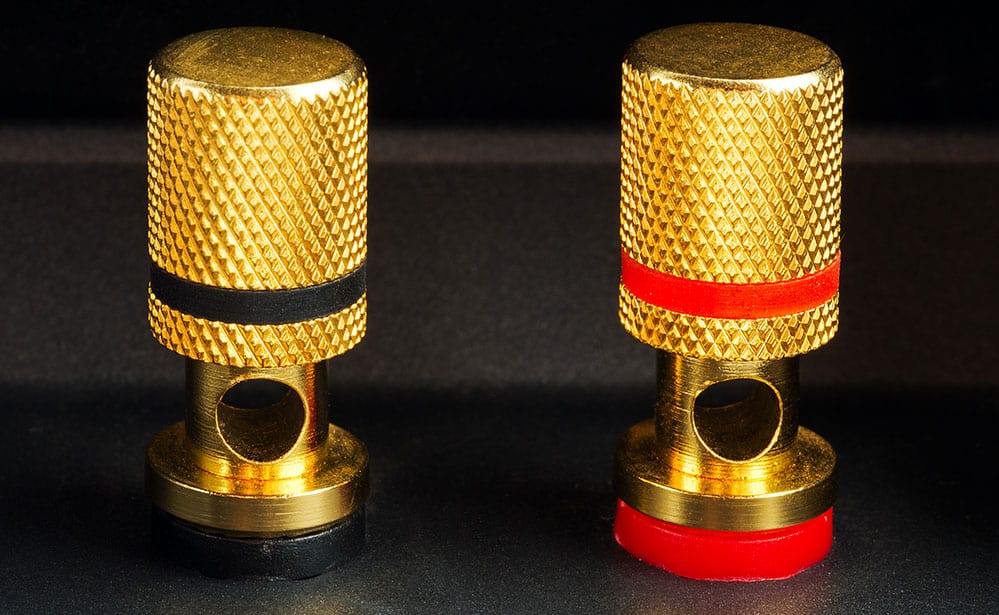
Many banana plugs will have a female connection on the bottom end – like the ones pictured above. This allows you to plug another banana plug into it.
This is useful if connecting multiple speakers to the same terminal. You won’t often need to do this, but sometimes it can be helpful.
For example, if you need to feed a high-level subwoofer input from the front left and right speaker terminals.
Banana plug pins are a standard 4mm in diameter, just right to fit into the end of a binding post.
Spades are an alternative way to terminate your speaker wire.
As with banana plugs, using spades at both ends will require four spade connectors for each wire.

The spade connector can either be angled or straight. It shouldn’t matter too much which one you buy. But, in some circumstances, one may be easier to fit than the other.
They usually connect to the speaker wire by crimping, soldering or by a screw connection like with banana plugs.
Crimping is where you use a tool to bend the connector’s end so that it clasps tightly to the wire, and it can be a good solution if you don’t want to get involved in soldering the wire.
It’s always best to use a proper crimping tool to make the join. Although it’s tempting just to grab a pair of pliers, you won’t get the same tight connection.
Done correctly, a spade-crimped connection shouldn’t need soldering.
Once the spades are attached to the wire, you must unscrew each binding post and push them into place. They will be very secure once you tighten the cap again.
This is preferable to using bare wire as you can be sure of a tight and reliable connection.
Top 45-Degree Spade Plugs
What Is It: Spade plugs connect to the end of your speaker wire and make wiring your system together much easier.
Spade connectors can be ideal when attaching a wire to speakers installed very close to a wall. In that case, you may not have enough room to use banana plugs.
So, if you don’t want to use bare wire, spade connectors will connect at a 45 or 90-degree angle allowing the wire to drop straight down.
Pin connectors are like a smaller version of a banana plug. In fact, in some cases, you might see them referred to as banana plugs.
They come with pins that are generally about 2mm in diameter. The pin is either straight, or you can get them with angled pins.

Like spades and banana plugs, you need to strip some insulation from the wire and attach the pins to the bare wire.
Crimping or soldering is often used to connect these to the wire. However, like the pin connectors in the picture above, they may also have a screw-in connection.
Just undo the screw a little, insert the bare wire, and then tighten the screw again. Then, make sure you have a firm connection by gently pulling the speaker wire.
This type of speaker wire termination is generally used for spring clip connections. Simply push down the clip and insert the pin into the hole.
Popular Pin Plugs
You could also use them with binding posts by inserting them through the central hole in the post – and then tightening the cap. But it’s not the usual way of using this type of connector.
Using pin connectors is a cleaner method than using bare wire, increasing the chances of a solid connection.
Once you have your speaker cable terminations ready, you just need to connect the wires to your amplifier and speakers.
A stereo amplifier and speakers will connect like this:

Just make sure you connect the amplifier output marked speaker left to the left speaker – and the output marked speaker right to the right speaker.
Also, the same end of the wire must connect to the positive terminal at the amplifier and speaker – and the same for the negative terminals.
The speaker wire is usually marked in some way so that you know which is the same wire at each end.
A multichannel AV receiver is a little more complicated as it has more speaker terminals. However, the concept for home theater wiring is the same as with a stereo amplifier.
You just need to make sure that you connect each output terminal to the correct speaker.
If you have a 7.1 speaker layout or are using Dolby Atmos speakers, you will have even more speakers to connect.
But it’s the same procedure, just take your time and make sure you get it right the first time.
Running the auto room configuration on your AV receiver will send a test signal to each speaker. So, you will soon find out if you connected the correct speakers to the amplifier’s rear.
If not, no problem. Just unplug it from the amplifier and try again.
First, it depends on what you mean by reverse. There are a couple of ways you might do this.
What if you connect the left speaker to the terminal marked right on the amplifier? And the right speaker to the terminals labeled left?
In that case, nothing would happen. However, the sound engineer who mixed the audio would be annoyed.
For music, the drum kit would be the ‘wrong way round.’ Any sound effects or instruments placed on the left would appear on the right – and vice versa.
Nobody would care apart from the artist who spent six months getting everything just right.
There is no effect if you reverse the positive and negative wires for a single speaker. Negative to positive and positive to negative from the amplifier to a single speaker.
The speaker will work normally.
It would also be fine if you wired stereo speakers incorrectly, with both wired from positive to negative on the amplifier and speaker (or vice versa).
But, if you connect two speakers differently, this is known as wiring the speakers out of phase.
In this case, you wire one speaker from positive to positive and negative to negative. But the other is wired incorrectly from negative to positive and positive to negative.
Then, the diaphragm in one speaker would move out while it would move inwards in the other. It’s hard to explain what this sounds like, but it just sounds odd. It will appear thin and lacking in body.
| Wiring Method | Effect |
|---|---|
| In phase – Both speakers wired positive to positive and negative to negative | Normal stereo sound. Speakers move in and out together, enhancing bass. |
| Out of phase – Speakers wired differently. One positive to positive, and negative to negative. But the other, positive to negative and negative to positive. | Weak bass and thin sound. Speakers move in opposite directions, canceling out low frequencies. |
| Swap Channels – Left speaker wired to right output and vice versa | Soundstage reversed. What should be on the left comes from the right and vice versa. Annoying but harmless. |
What is happening is that some of the lower frequencies will cancel each other out as the sound waves move away from the speaker.
So, you won’t break anything, but it just won’t sound right. You’ll probably notice it if you’ve done it, but double-checking your wiring is always good.
Some AV receivers will detect speakers wired out of phase when you run the automatic room setup. Although, they don’t always get it right.
If you are interested, this is an excellent video demonstrating why you need to connect your speakers in phase:

Were you confused about connecting speaker wire to your amplifier and speakers?
If so, I hope you’ve found the answers to your questions.
It’s not too complicated when you get into the details, but it can seem confusing until you understand your different choices.
The connections on your amplifier and speakers are the first things to consider.
Once you know this, you can make the best choice for terminating the speaker wire.
You can take the easy route and just use bare wire – or choose to attach banana plugs, spades or pins.
There isn’t a wrong way. Just go with what seems to make sense for your system.
Paul started the Home Cinema Guide to help less-experienced users get the most out of today's audio-visual technology. He has been a sound, lighting and audio-visual engineer for around 20 years. At home, he has spent more time than is probably healthy installing, configuring, testing, de-rigging, fixing, tweaking, re-installing again (and sometimes using) various pieces of hi-fi and home cinema equipment. You can find out more here.