
by Svetlana Cheusheva , updated on September 27, 2023
4 quick ways to create appointment and meeting templates in Outlook 2010, Outlook 2013, Outlook 2016, Outlook 2019, and Outlook 365.
The average office employee spends over 5 hours weekly in meetings, which is around 11% of their work time! No wonder that we rarely give a second thought to meeting invites. Need to talk to someone? Send an invite. End of story :)
In the meantime, your appointment or meeting request matters a lot more than you may think. After all, you don't want people gazing at it thinking "What is this all about?". Long story short, an engaging and informative invitation is an important part of running a successful event, and a well-crafted template can save you enormous time on the job.
If you frequently send invitations with the same or very similar body and subject, an invite template can help you avoid a lot of repeated typing.
Available in: Outlook 2010 - Outlook 365
To make a meeting template in Outlook, carry out these steps:


That's it! Your Outlook meeting invite template is ready for use.
The steps to create an appointment template are exactly the same.
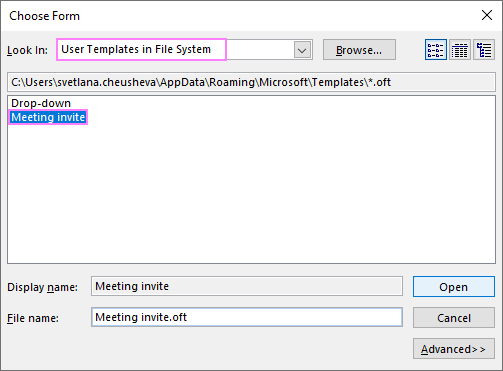
Surprisingly, opening an Outlook template requires far more clicks than creating it.

A new invitation is created from the template right away. Just remember to replace all the placeholders with actual information, set the date and time, and your meeting invite is good to go.
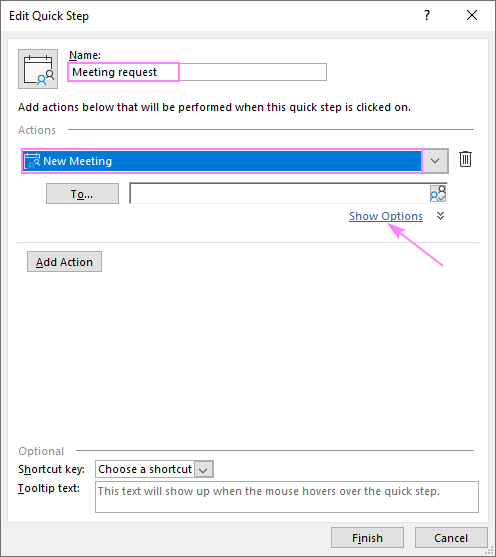
Outlook Quick Steps are designed to perform a sequence of actions with a single command. In this case, it's the creation of a new meeting request that we are automating.
Supported in: Outlook 2010 - Outlook 365, the new Outlook
To configure your meeting template, these are the steps to perform:

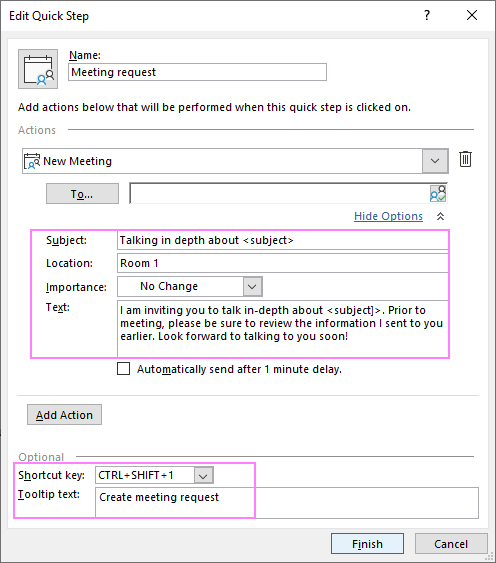
When all set, click Finish.
Tip. If you are using the new Outlook app for Windows, please refer to this tutorial: Quick Steps in new Outlook and web.
The best thing about Outlook Quick Steps is that they are incredibly easy to use.

To start with your meeting request template, simply click on it in the Quick Steps gallery or press the assigned keyboard shortcut.
Tip. To quickly insert reusable pieces of content into a meeting body, you can use Outlook Quick Parts.
When scheduling a meeting with a group of people, agenda is the best place to convey your goals, so that everyone knows exactly what they are getting into and what they are getting out of it :)
This example shows how to create a meeting agenda template in Outlook using a custom form. Traditionally, designing Outlook forms is considered to be one of those things that only an expert with programming skills can cope with. But that's not exactly true. A basic form won't present any difficulty even for beginners.
Supported in: Outlook 2007 - Outlook 365
To start with, enable the Developer tab in your Outlook. For this, right-click anywhere on the ribbon, click Customize the Ribbon, and then select the Developer check box under the list of Main Tabs on the right.
And then, create a custom form for your meeting template in this way:


 If needed, you can also add your custom fields, controls, and code. But for our purposes, the basic functionality will suffice.

Depending on your default mail delivery location, a published form is stored as a hidden item in either the .pst file or the root folder of your mailbox.
As with .oft templates, using a custom form in Outlook requires digging quite deep into the menus.

You start by navigating to the Home tab > New Items > More Items > Choose Form. The Choose Form dialog window will show up. In the Look in drop-down list, select Personal Form Library and double-click your meeting template, or select it and click Open.
A new meeting request will be automatically created from your template. You make the required changes and hit Send.
You've designed a nice meeting template using a custom form, but hate going through numerous clicks every time? Then set it as your default meeting form in Outlook. Here's how:


Done! From now on, you will always start with your template instead of a blank meeting invite.
The inbuilt features discussed in the previous parts work fine but with an important caveat: before your invite goes off, you should carefully review all the information to be sure that every placeholder text is replaced. To save you this trouble, you can insert fillable text fields or drop-down menus where appropriate, so you'll be asked for the values to fill in. Sounds like a good plan? Then, let's do it :)
To accomplish this task, we'll be using Shared Email Templates. Despite its name, the tool is not limited to just emails, meeting and appointment templates are supported as well. If you don't have this handy add-in in your Outlook yet, you can download a free version from Microsoft App Source first, and then proceed with the below steps.
Supported applications: Outlook for Microsoft 365, Outlook 2021 - 2016 (Windows and Mac), Outlook on the web
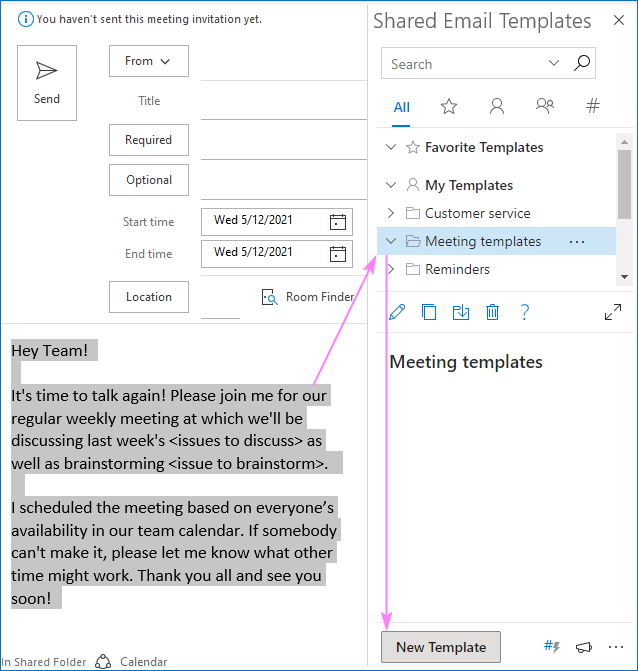
For this example, we'll be using a recurring meeting invite, which is perfect for templates with fillable fields because your goals and talking points are unlikely to change much from meeting to meeting.
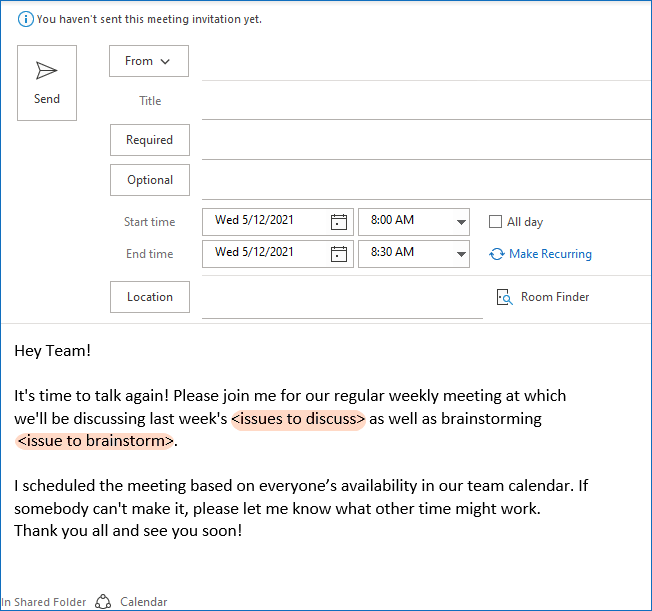
Here's our sample invite for a weekly team meeting:
For , we are going to set up an editable multi-select dropdown list of things you typically discuss with the team.
For , we will create a text field where you can type the brainstorming topic for a given meeting.
And here are the steps to create an Outlook meeting template with fillable fields:


Our dropdown list settings look as follows:
Clicking the Insert button will replace the placeholder with the following code:

~%WhatToEnter[email campaign;promotion campaign;web-site traffic;financial report;]
After performing the above customizations, we've got the below template with 7 macros that automate the creation of a recurring meeting invite:
1 - creates an editable multi-select dropdown list.
2 - creates an input text box.
3 - inserts the sender's first name as a short informal signature.
4 - fills in the title.
5 - inserts the email address of the required attendees.
6 - inserts the email address of the optional attendee.

7 - presets the location.
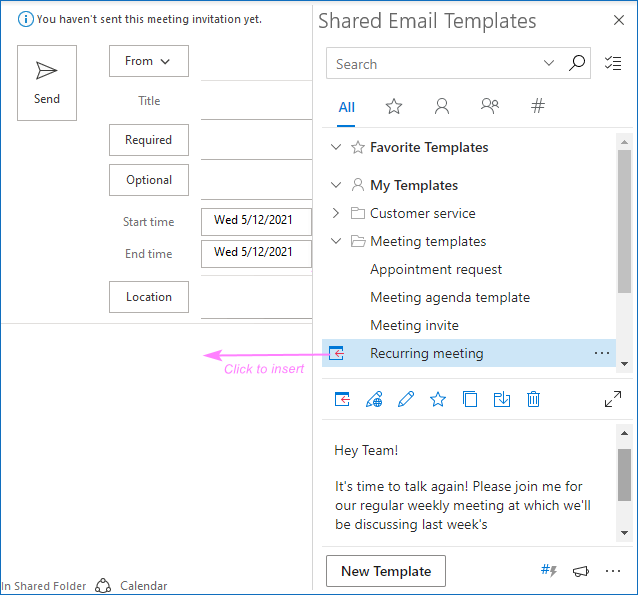
This is my favorite part :) As all template functionality is integrated in the meeting window, there's no switching between tabs or navigating through menus. All you need to do is click the Paste icon next to the template's name or double-click the template.

Then, make your choices in the dropdown menu and enter some text in the input box:
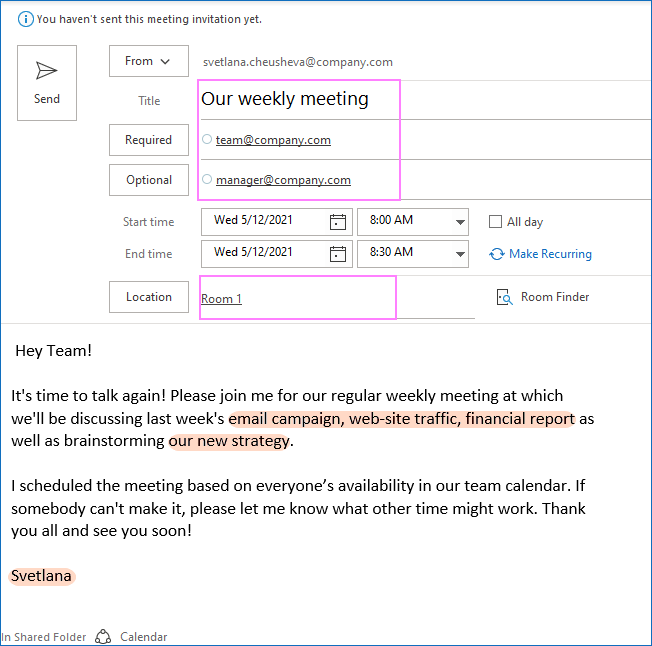
Like magic, the input details are inserted in the appropriate places in the body, the attendees' addresses are added, the title is filled in, and the location is defined. The only thing left for you to do is set the date and time.
Looks fabulous, isn't it? To discover other amazing features included with Shared Email Templates, I encourage you to choose a free subscription plan on the above-linked page or download the add-on directly from Microsoft App Source. Your feedback in comments is most welcome :)
Thank you for reading and hope to see you on our blog next week!